Access Your IoT Devices Remotely For Free With SSH
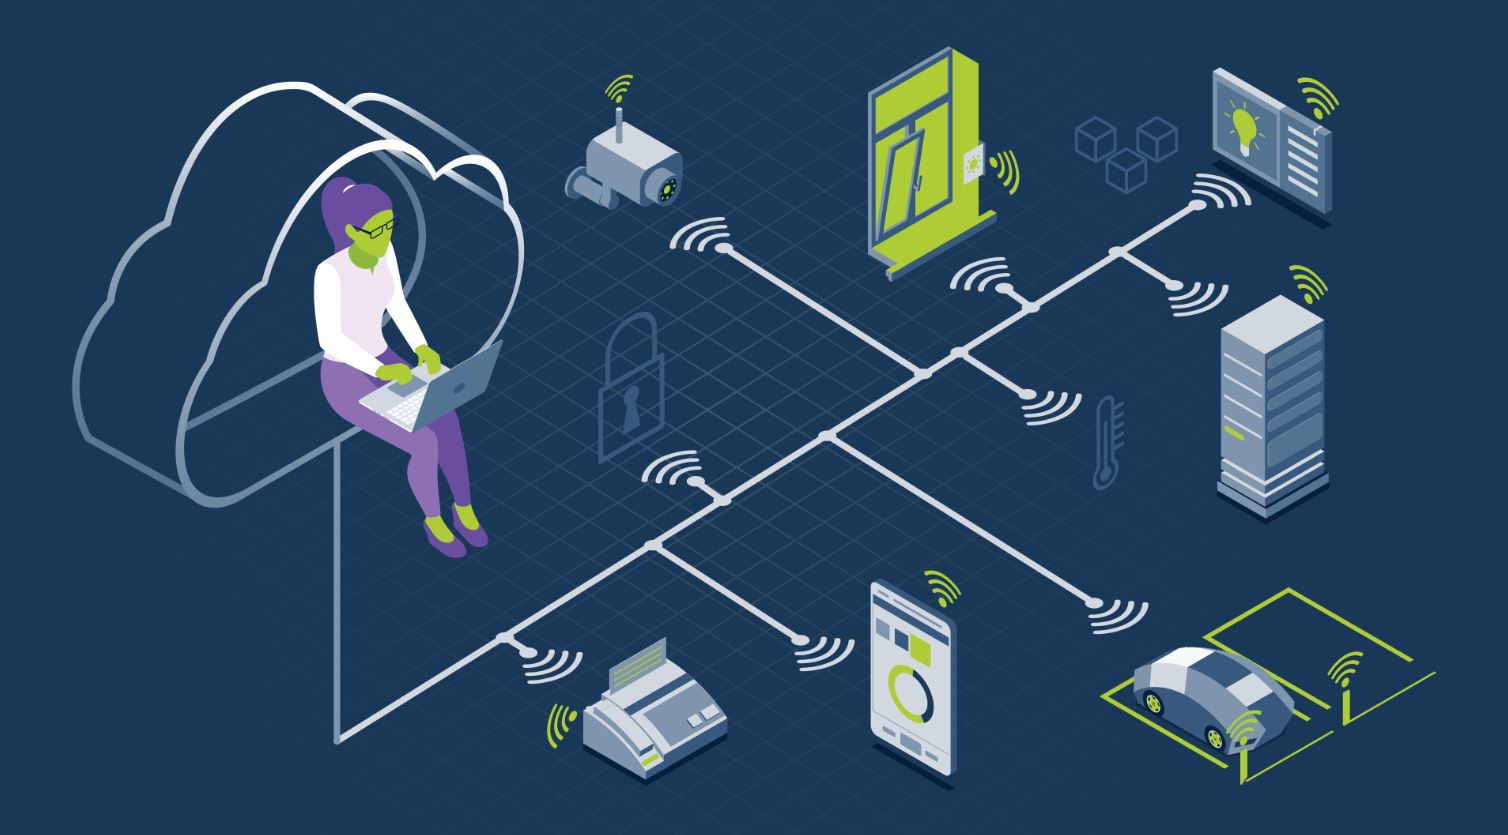
Do you ever wish you could check on your smart home gadgets or your Raspberry Pi projects when you are not actually at home? Perhaps you have a small sensor network, or maybe a tiny server running some useful tasks, and you just want to reach it from anywhere. It feels really good to have that kind of control, you know, without needing to pay for some fancy service. Getting your IoT devices to talk to you remotely, that is, over the internet, can seem like a big puzzle at first, but there is a straightforward, free way to do it using something called SSH.
Many people run into little snags when trying to set up remote access, like when their SSH suddenly stops working after they put new software on their server, or maybe after they change a password on their main computer. It can be a bit frustrating, honestly, when something that worked just fine before suddenly acts up. We have all been there, like when you are trying to connect to a database remotely and your usual tools just do not seem to get it right. This guide will walk you through how to get that secure connection working for your devices, and it will not cost you a thing, which is pretty neat.
This whole idea of connecting to your devices from afar, completely free, is a rather popular topic right now. People are always looking for smart ways to manage their tech, especially their little IoT bits and pieces. We will show you how to set up SSH so you can manage your gadgets from anywhere, keeping things secure and simple. It is more or less about setting up the right pathways and making sure your device is ready to listen for your commands, which is actually quite empowering.
Table of Contents
- Why Remote SSH for Your IoT Gadgets?
- The Basics of SSH for Your Gadgets
- Getting Your IoT Device Ready for Remote Access
- Making the Connection: From Your Computer to Your Device
- Beyond the Basics: Advanced SSH Tricks for IoT
- Keeping Things Safe: Security Tips for Remote IoT Access
- Common Hurdles and How to Jump Over Them
- Frequently Asked Questions
- Wrapping Things Up
Why Remote SSH for Your IoT Gadgets?
Connecting to your IoT devices from far away, like when you are on vacation or at work, just gives you so much freedom. You can check sensor readings, restart a service that is acting up, or even update the software on your tiny computer without having to be in the same room. This is really useful, you know, especially if your device is tucked away in a hard-to-reach spot or if you have many of them scattered around. For example, if you have a weather station running on a Raspberry Pi in your garden, you can pull up its data from your phone while sitting at a coffee shop, which is pretty cool.
Using SSH, which stands for Secure Shell, means your connection is encrypted. This is a big deal because it keeps your commands and any data you send or receive private. So, basically, no one can snoop on what you are doing with your device. It is a very secure way to manage things, which is what you want when dealing with devices that might be connected to your home network. Plus, it is completely free to use, which helps keep your project costs down, so that is a definite plus.
Many people use SSH for all sorts of tasks. For instance, some folks use it to manage their Git repositories, pushing and pulling code changes from a remote server. Others might connect to a database like PostgreSQL running on a server to manage its data, even if their usual database tool is struggling to connect directly. It is a versatile tool, honestly, and it is almost like having a direct line to your device, no matter where you are, assuming you have an internet connection, of course.
The Basics of SSH for Your Gadgets
SSH is a network protocol that lets you access a computer or device over an unsecured network in a very secure way. Think of it like a secure tunnel through the internet. When you use SSH, your computer acts as the "client" and your IoT device acts as the "server." The client sends commands, and the server runs them and sends back the results. This is how you get that command-line interface on your device from a distance, which is rather handy.
The main parts of SSH are the client software on your computer (like Terminal on a Mac or Linux, or PuTTY on Windows) and the SSH server software running on your IoT device (often called `sshd`). When you try to connect, these two pieces of software talk to each other. They first agree on a secure way to communicate, and then they check if you are allowed to connect. This checking part usually involves a username and a password, or, even better, a special pair of digital keys, which is a bit more secure.
Using SSH keys is generally the preferred method for security. You have a "private key" on your computer, which you keep secret, and a "public key" that you put on your IoT device. When you try to connect, your device challenges your computer to prove it has the private key that matches the public one. This way, you do not have to send your password over the network, which is very good for keeping things safe. It is a bit like having a unique digital fingerprint for access, so that is pretty cool.
Getting Your IoT Device Ready for Remote Access
Before you can connect remotely, your IoT device needs to be set up to accept SSH connections. Most popular IoT boards, like the Raspberry Pi, come with SSH capabilities built in, but you might need to turn them on. For a Raspberry Pi, for example, you can enable SSH through its configuration tool, `raspi-config`, or by simply placing an empty file named `ssh` in the boot partition of its SD card. This usually gets the server part running, which is the first big step.
Next, your device needs to be connected to your home network, and it needs an IP address. You can usually find this IP address by logging into your router's administration page or by running a command like `ifconfig` or `ip a` directly on the device's command line. Knowing your device's local IP address is crucial for connecting to it when you are on the same network. This is more or less like knowing its street address within your home, so that is important.
For truly remote access, meaning from outside your home network, you will need a public IP address or a way to get around not having one. Most home internet connections give you a dynamic public IP address, which changes sometimes. To deal with this, many people use a Dynamic DNS (DDNS) service. This service gives you a fixed web address (like `mydevice.ddns.net`) that always points to your home network's current public IP. It is basically a way to give your home a permanent online name, which is very helpful for remote access.
Making the Connection: From Your Computer to Your Device
Once your IoT device is ready, connecting to it is actually quite simple. If you are using a Mac or Linux computer, you already have an SSH client built into your terminal. For Windows users, you can use the built-in OpenSSH client in PowerShell or Command Prompt on newer versions of Windows, or a free tool like PuTTY. You just open your terminal or PuTTY, and you are ready to type in your command, which is pretty convenient.
The basic command to connect is `ssh username@ip_address`. So, if your Raspberry Pi's username is `pi` and its local IP address is `192.168.1.100`, you would type `ssh pi@192.168.1.100`. The first time you connect, your computer might ask you to confirm the device's "fingerprint" to make sure you are connecting to the right place and not some imposter. You type "yes" to this, and then it might ask for your password, or if you set up keys, it will just connect, which is very smooth.
If you are using SSH keys, you might have to tell your SSH client where your private key is, especially if it is not the default `id_rsa` key. For instance, if you made a special key just for your IoT device, you might use `ssh -i /path/to/your/special_key username@ip_address`. This tells the client exactly which key to use for that connection. It is a good practice to use different keys for different connections, as a matter of fact, for better security and organization.
Beyond the Basics: Advanced SSH Tricks for IoT
SSH can do so much more than just give you a command line. It has some really powerful features that are super useful for IoT devices. These advanced tricks can help you do things like access web interfaces that are only available locally on your device, or even run graphical programs from your IoT gadget on your desktop computer. It is almost like having your device right there with you, even when it is far away, so that is pretty amazing.
Opening Doors: Port Forwarding
Sometimes, your IoT device might be running a web server or a database that you want to access from your computer, but it is only listening for connections on its local network. This is where port forwarding comes in. You can use SSH to create a "tunnel" that sends traffic from a port on your local computer to a port on your remote IoT device. For example, if your device runs a web interface on port 80, you could set up a tunnel to access it from `localhost:8080` on your own machine. This is very useful for managing things like a Home Assistant instance or a database like PostgreSQL that is running on your device, which is quite common.
The command for local port forwarding looks something like `ssh -L 8080:localhost:80 username@ip_address`. This means traffic sent to port 8080 on your local machine will go through the SSH tunnel to port 80 on the IoT device. This is a bit like having a secret passage, you know, that only you can use to get to specific services on your device. It lets you interact with services that are otherwise hidden from the outside world, which is a great security feature too.
Secret Pathways: SSH Tunnels
SSH tunnels are incredibly versatile. Beyond just local port forwarding, you can also set up remote port forwarding, where a port on your remote device is forwarded to your local machine. Or, you can even create dynamic port forwarding, which turns your SSH connection into a SOCKS proxy. This proxy can then route all your internet traffic through your IoT device, which can be useful for accessing resources on the IoT device's local network or for anonymizing your browsing. It is a powerful way to extend your network reach, honestly, and it is pretty flexible.
For example, if you have a database like PostgreSQL running on your Ubuntu server (like in "My text" where someone had PostgreSQL 9.3 on Ubuntu 14.04), and you can SSH into it, but your graphical tool like pgAdmin III struggles to connect directly, an SSH tunnel can fix that. You set up a tunnel from your local machine to the database port on the server, and then pgAdmin connects to your local port, which then goes through the tunnel to the database. It is a bit of a workaround, but it works really well, so that is a solution many people use.
Seeing Things: X Forwarding
What if your IoT device has a graphical application you want to run, but it does not have a screen? SSH can help with that too, using X forwarding. If you enable X forwarding when you connect, graphical output from programs running on your remote device can be displayed on your local computer's screen. This is incredibly useful for things like running a simple GUI tool or even just seeing a graph generated by a program on your Raspberry Pi. It is almost like your tiny device is projecting its screen onto yours, which is very clever.
To use X forwarding, you typically add the `-X` flag to your SSH command: `ssh -X username@ip_address`. On your local machine, you will need an X server running (Mac and Linux usually have this by default, Windows users might need to install something like VcXsrv). Then, when you run a graphical program on your remote device, its window will pop up on your desktop. It is a really neat trick for remote debugging or configuration, as a matter of fact, especially for those little graphical utilities.
Doing Things Automatically: Automating Commands
You can also automate SSH commands, which is super helpful for regular tasks or for building scripts. Instead of typing the same command every time, you can put it directly into your SSH command. For instance, `ssh username@ip_address "ls -l /var/log"` will connect, run `ls -l /var/log`, and then disconnect. This is very efficient for checking logs, getting sensor data, or triggering specific actions on your device without needing a full interactive session. It is a bit like sending a quick text message to your device with instructions.
Many people write scripts in Python or other languages to automate these kinds of interactions. They might use libraries that handle the SSH connection, allowing them to send multiple commands, check output, and make decisions based on what the device sends back. This is how you can build a system that automatically fetches data from your sensors every hour or restarts a service if it detects a problem. It is a truly powerful way to manage your IoT fleet, which is something many folks are interested in doing.
Keeping Things Safe: Security Tips for Remote IoT Access
While SSH is secure, setting up remote access does open a door to your device from the internet. So, it is really important to take some steps to keep that door locked tight. First and foremost, always use strong, unique passwords for your IoT devices. Better yet, switch to SSH key-based authentication and disable password login entirely. This is a much more secure method, as we talked about earlier, and it is highly recommended for any device exposed to the internet.
Another crucial step is to change the default SSH port (which is 22) to a different, non-standard port. Many automated scanning tools look for SSH on port 22, so changing it makes your device less visible to these casual attackers. You would then specify this new port when you connect, like `ssh -p 2222 username@ip_address`. This is a simple but effective way to add a layer of obscurity, which helps a lot.
Also, configure your router's firewall to only allow incoming SSH connections from specific IP addresses if you have a fixed external IP, or at least restrict access as much as possible. Only forward the SSH port you are using, and nothing else. Keeping your device's software up to date is also very important, as updates often include security fixes. Regularly checking for and installing updates helps patch any known vulnerabilities. It is basically about making sure your device's defenses are always strong, which is very sensible.
Common Hurdles and How to Jump Over Them
Even with the best intentions, you might hit a few bumps on the road to free remote SSH access. One common issue is SSH suddenly not working after installing new software or making system changes. This happened to someone after installing GitLab, for instance. Often, this is because the new software changed network configurations, firewall rules, or even conflicted with the SSH server itself. Checking firewall settings on your device (like `ufw` on Ubuntu) or router is a good first step. Sometimes, simply restarting the SSH service (`sudo systemctl restart sshd`) can fix it, which is worth trying.
Another frequent problem is related to SSH keys or authentication. If you changed your Apple ID password and then your Mac had issues connecting, it might be related to how your local SSH agent handles keys, or perhaps permissions on your private key file. Always make sure your private key file has the correct permissions (usually `chmod 400 your_key_file`). If you are managing multiple key pairs for different servers or proxy servers, it is easy to mix them up. Using the `-i` flag to specify the correct key, or configuring your `~/.ssh/config` file, can help manage these different keys effectively. This is a bit like making sure you have the right key for the right lock, you know.
Network connectivity and stability can also cause headaches. If your terminal freezes after a few seconds, or if you cannot connect at all, it could be a firewall blocking the connection, a network issue at your home or on the internet service provider's side, or even a timeout setting. If your connection works fine when you are at your workplace but not at home, that really points to a difference in network setup or firewall rules. Checking your router's port forwarding settings and ensuring your public IP address has not changed (if you are not using DDNS) are good troubleshooting steps. It is often a matter of patiently checking each part of the connection path, which can take a little time.
Sometimes, if you are pulling or fetching from Git repositories and it hangs, that is often an SSH connection issue too. This can be related to network stability or SSH agent problems. Running `ssh -v username@ip_address` can give you very detailed output about the connection process, which helps pinpoint where things are going wrong. This verbose output is like having your SSH client tell you exactly what it is doing step-by-step, so that is very helpful for figuring things out.
Frequently Asked Questions
Here are some common questions people ask about remote SSH access for IoT devices:
How can I remotely access my Raspberry Pi for free?
You can access your Raspberry Pi remotely for free using SSH. First, enable SSH on your Pi. Then, set up port forwarding on your home router to direct SSH traffic from your public IP address to your Pi's local IP. For dynamic public IP addresses, use a free Dynamic DNS (DDNS) service to keep a consistent hostname pointing to your home network. This is generally the most common approach, and it works quite well.
Is it safe to SSH into IoT devices from anywhere?
Yes, SSH itself is a secure protocol, but the safety of accessing your IoT devices from anywhere depends on how you set it up. It is very important to use strong, unique passwords or, even better, SSH key-based authentication. Changing the default SSH port, limiting access through firewall rules, and keeping your device's software updated are all crucial steps to make it safe. Without these precautions, you could be opening your device to potential risks, so that is something to be mindful of.
What do I need to set up remote SSH for my smart home gadgets?
To set up remote SSH for your smart home gadgets, you will need a device capable of running an SSH server (like a Raspberry Pi or other Linux-based IoT device). You also need access to your home router to configure port forwarding. A computer with an SSH client (most operating systems have one built-in) is also necessary. Optionally, a Dynamic DNS service can provide a stable hostname if your home internet has a changing public IP address. These are the main components, more or less, that you will need to get started.
Wrapping Things Up
Getting your IoT devices to communicate with you remotely, without any cost, using SSH is a truly powerful skill. We have covered the basic setup, from preparing your device to making that first connection. We also looked at some really useful advanced tricks, like port forwarding for accessing web interfaces, SSH tunnels for tricky database connections, and even X forwarding for graphical programs. And, of course, keeping things secure is always a top priority, so we talked about key authentication and firewall rules. Remember that if you are interested in learning more about setting up these kinds of connections, you can always Learn more about secure remote access on our site, and you might find even more tips on our dedicated page for IoT security. It is a journey of small steps, but each one makes your control over your devices a little stronger, which is quite rewarding.

How to remotely ssh iot device in web browser

IoT SSH Remote Access - SocketXP Documentation
How Do I Access My IoT Device Remotely? | Robots.net
